Visual Studio Team Services (VSTS) is a great way to build and manage the process of building software. If you don’t know what is VSTS, here is a quote from the official docs site:
VSTS is a cloud service for collaborating on code development. It provides an integrated set of features that you access through your web browser or IDE client, including:
- Git repositories for source control of your code
- Build and release management to support continuous integration and delivery of your apps
- Agile tools to support planning and tracking your work, code defects, and issues using Kanban and Scrum methods
- A variety of tools to test your apps, including manual/exploratory testing, load testing, and continuous testing
- Highly customizable dashboards for sharing progress and trends
- Built-in wiki for sharing information with your team
VSTS has a great support for setting up and running CI\CD processes. As part of your CI build definition it’s possible to run PowerShell script as well. And it’s also possible to run PnP-PowerShell scripts, however a few adjustments required.
In today’s post I’m going to describe how you can configure your CI build process to run PnP-PowerShell script.
Let’s start from the very beginning and create a new build definition.
From Build & Release click “New definition”:

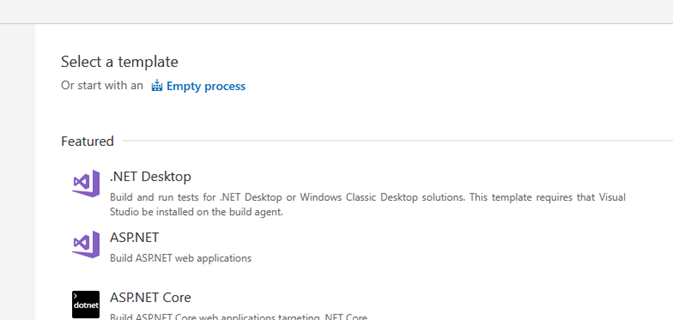
Select Empty process as starter template:
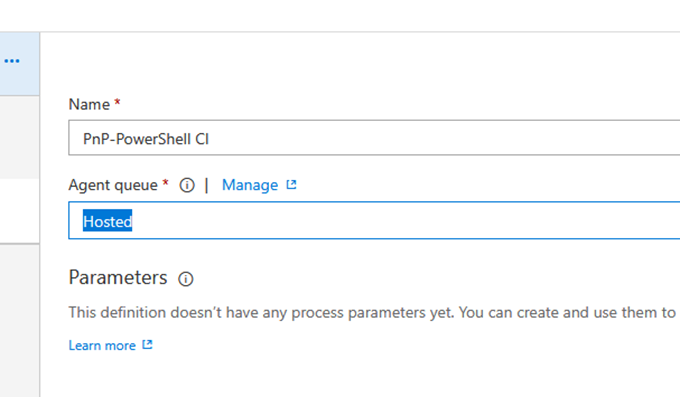
Give definition a name, for example PnP-PowerShell CI:
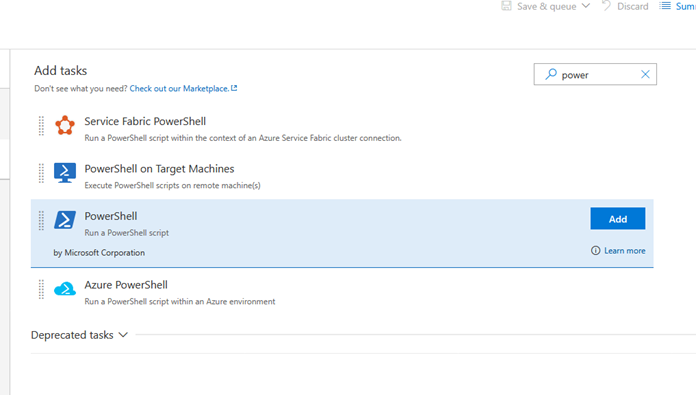
Add a new PowerShell task:
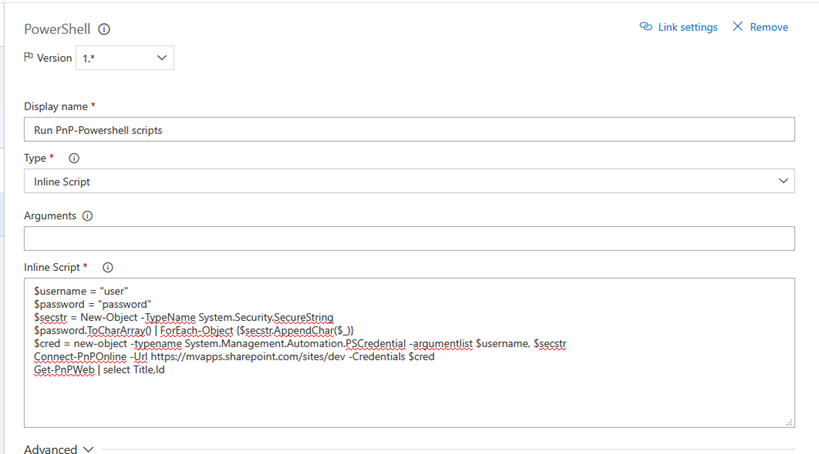
As type of script you can select either File Path (in that case your .ps1 should to be in repository) or Inline script. Let’s use inline for simplicity. The script is very basic, it prints web’s Title and Id:
$username = "user"
$password = "password"
$secstr = New-Object -TypeName System.Security.SecureString
$password.ToCharArray() | ForEach-Object {$secstr.AppendChar($_)}
$cred = new-object -typename System.Management.Automation.PSCredential -argumentlist $username, $secstr
Connect-PnPOnline -Url https://mvapps.sharepoint.com/sites/dev -Credentials $cred
Get-PnPWeb | select Title,Id
in VSTS:
I hardcoded username and password in script body, however I’ll improve it in just a minute. Stay tuned until the end of the post.
Save and Queue your build finally!
BAM! #1

Connect-PnPOnline : The term 'Connect-PnPOnline' is not recognized as the name of a cmdlet, function, script file, or
operable program. Check the spelling of the name, or if a path was included, verify that the path is correct and try
again.
Of course, VSTS knows nothing about PnP-PowerShell, we need to install PnP-PowerShell module first.
Let’s add another inline PowerShell task to build definition and put single line inside:
Install-Module SharePointPnPPowerShellOnline
Run build again.
BAM! #2

Install-Module : Administrator rights are required to install modules in 'C:\Program Files\WindowsPowerShell\Modules'.
Log on to the computer with an account that has Administrator rights, and then try again, or install
'C:\Users\buildguest\Documents\WindowsPowerShell\Modules' by adding "-Scope CurrentUser" to your command. You can also
try running the Windows PowerShell session with elevated rights (Run as Administrator).
The error says I can’t install module because I’m not an admin. Hopefully it’s possible to install module scoped to the user. Hint: you also should add –Force parameter in order to skip confirmation prompts. So let’s update our install module scripts:
Install-Module SharePointPnPPowerShellOnline -Force -Verbose -Scope CurrentUser
Run it.
BAM! #3

Exception calling "ShouldContinue" with "2" argument(s): "Windows PowerShell is in NonInteractive mode. Read and
Prompt functionality is not available."
Install-Module : NuGet provider is required to interact with NuGet-based repositories. Please ensure that '2.8.5.201'
or newer version of NuGet provider is installed.
First paragraph is not very informative, however second one tells us about the issue we have. We need to install nuget provider in order to install PS modules from nuget. Let’s update install module script (hint: we have to install provider for current user as well):
Install-PackageProvider -Name NuGet -Force -Scope CurrentUser
Install-Module SharePointPnPPowerShellOnline -Force -Verbose -Scope CurrentUser
Ok, run the build again.
Success!
One thing still need to improved – hardcoded username and password. We’ll store it inside build variables. Under build definition click on variables and add two variables – sp_user and sp_password. Click on lock icon to make password masked, don’t forget to check Settable at queue time:

Add two arguments to your script and read them in body:
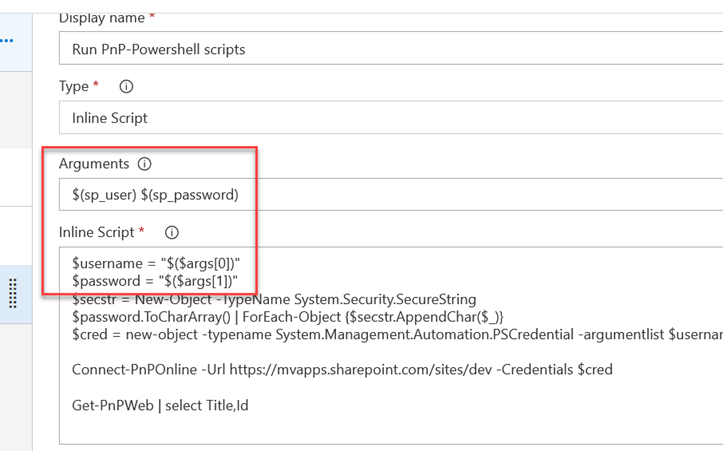
Now your build definition fully configured to use with PnP-PowerShell module.
To recap, install module script:
Install-PackageProvider -Name NuGet -Force -Scope CurrentUser
Install-Module SharePointPnPPowerShellOnline -Force -Verbose -Scope CurrentUser
and the main script:
$username = "$($args[0])"
$password = "$($args[1])"
$secstr = New-Object -TypeName System.Security.SecureString
$password.ToCharArray() | ForEach-Object {$secstr.AppendChar($_)}
$cred = new-object -typename System.Management.Automation.PSCredential -argumentlist $username, $secstr

Connect-PnPOnline -Url https://mvapps.sharepoint.com/sites/dev -Credentials $cred

Get-PnPWeb | select Title,Id
Hope this helps!